I’m posting these here to provide a higher quality option than most social media provides.


Calvin and Hobbes via This Isn't Happiness
More and more, I'm pretty sure we should have named our son "Calvin".
Playing with fire...
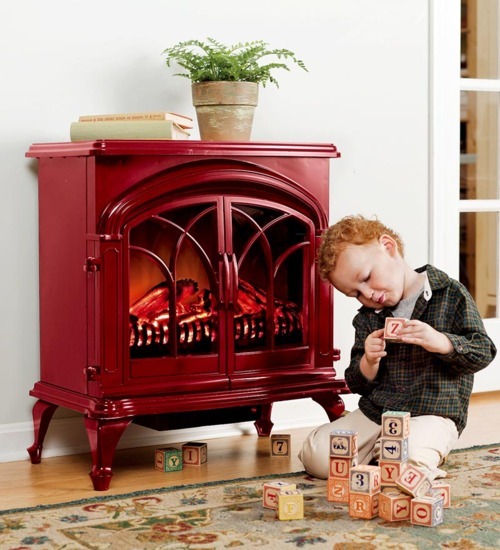
Some people disagree with our choice to leave Gary Jr. at home by himself, but Elaine and I can’t imagine what could go wrong.
A highpoint in my career…
Not only did I (finally) get a photo featured on Catalog Living, but that’s my son playing the role of Gary Jr.

Can I Get a Gray Card, Please?
Anyone who has worked with me in the past few years is probably familiar with my assistant, Matt. A while ago, while re-organizing old archives into a Lightroom catalog I got the clever idea to pull out any light-check, stand-in photos featuring Matt and put them together into a photo book as commemorative thank-you. I’m pleased with the results and the book is a fun look back on our work together. The cover worked out especially well. The image is perfect and I was so glad to find a great hand-drawn block font [Cul De Sac].
I don’t have much experience with other on-demand photo book services, but my experience with iPhoto was great. Sure, the template based layout is limited and somewhat inflexible, but the benefit is that I was able to throw this book together pretty quickly. The structure of the iPhoto templates saved me from myself by not letting me noodle around too much with picture boxes and crops, but gave me plenty of options to put together a nice looking layout. Print quality is very good considering that this is an on-demand book. Color and contrast are great and the photos hold up well to all but the closest scrutiny.


A New Self-Portrait
Yesterday I let myself play a little bit and acted on a self-portrait idea that’s been kicking around in my head for a few months. What was supposed to be a quick setup to test the concept ended up producing a final image.
I first got the idea for this picture when I found and signed up for About.me (an online service that allows users to set up a simple, clean bio page linking to various web sites and services). I really like the simple but flexible formatting template that About.me has created. The variety of profiles featured in their directory demonstrate the possibility of great creative diversity within a limited structure.
Part one, making the picture:
This photo was made by composing a scene with a 4x5 view camera and then using a second camera to photograph the ground glass, composing loosely enough to see the 4x5 camera and some of the out of focus background. The final image is rotated 180 degrees to make the ground glass image upright and as a result the camera appears upside-down.
What you see is the combination of three exposures. For the first two, I draped a black cloth over the space between the two cameras to avoid ambient light contaminating the ground glass image. This is just like the classic image of the photographer ducking under the black cloth behind a big view camera. The first exposure was the main scene lit entirely by strobes. This was necessary because the image projected on the ground glass was far to dim to capture a portrait with ambient light alone - the long exposure would have left me a blurry mess. The second exposure was a longer exposure of the scene to allow the cool late-afternoon window light to burn in a bit. The third exposure was taken without the black cloth and adjusted to properly expose the 4x5 camera body and the surrounding scene. These three shots were easily merged in Photoshop with little other manipulation beyond the usual dodge-and-burn adjustments.
Part two, the concept:
Everything about this photograph relates to the idea of what a successful self-portrait should be and a desire to go beyond an obvious solution. I like to see pictures of people in their creative spaces and wanted to take that approach for my photo.
Right now, for me that place is this corner of my unfinished garage. I made the workbench out of plywood salvaged from some unneeded storage cabinets I took down to free up this space. I do need to insulate and finish the walls so I can use my workshop all year - the winter is too cold and the summer too hot. But I like the character of the rough space and am reluctant to simply hang drywall in there.
I don’t think that just taking a picture of me with a camera would be a successful self-portrait. So much of how I work is about the process of making images so I like that this portrait kind of tells the story of it’s own making, but in a way that I feel is balanced with just being a decent and interesting picture. Plus, I am such a tinkerer and at home in the workshop - and all of that stuff informs my work as a photographer. I like the way the image in the ground glass ended up being bookended by lighting equipment on one side and a drill press on the other. It wasn’t intentional or planned, but it worked out well.
And, yes - working with the view camera made me want to load up some film holders…
Hey, that looks a lot like...
A while ago I posted details about my iMac workstation. Just yesterday I found the Aero for the iMac by Tethertools.
Here’s a quick photo comparison:

I should be clear that I do not accuse or suspect Tethertools of copying my idea. I think this is most likely a clear case of form following function and the Tethertools table is born out of an existing product line.
I have been giving serious thought to updating my tabletop to not look like a hardware store hack and selling it on a limited basis. As a result I am interested to see this product on the market. Not much more to say about this — but I do welcome feedback if anyone is interested.

It's like Cook's Illustrated for Photoshop...
I really enjoy getting Cook’s Illustrated magazine because they describe in detail the process of trial and error that goes into creating a recipe. That insight about how ingredients work or don’t work doesn’t just apply to the related dish, but lends knowledge and insight that informs so many other meals I will prepare.
Which is why I was so happy to discover Julieanne Kost’s recent, and ongoing series of blog posts about blend modes in Photoshop. Each blog post addresses an individual group of blend modes as they are logically divided in Photoshop’s interface. Without getting too technical, Julieanne does a great job of giving a quick, clear description of what each blend mode is going to do to your pixels — and follows up with a series of images to demonstrate.
I’ve made extensive use of blend modes in the past, but just like a recent Cook’s Illustrated sugar cookie recipe’s description of what baking soda and baking powder each do for a recipe and how they work together will help me far beyond just cookies, Julieanne’s posts will help me work smarter and explore new options down the road.
Good stuff.
Here’s a link to the first post in the series and you can follow Julieanne on Twitter. Be sure to browse the rest of her blog - it’s full of great tips for Photoshop and Lightroom.
Dave Eggers on "selling out" vs. "saying yes"
Extracted from an email written by Dave Eggers over a decade ago:
The thing is, I really like saying yes. I like new things, projects, plans, getting people together and doing something, trying something, even when it’s corny or stupid. I am not good at saying no. And I do not get along with people who say no. When you die, and it really could be this afternoon, under the same bus wheels I’ll stick my head if need be, you will not be happy about having said no. You will be kicking your ass about all the no’s you’ve said. No to that opportunity, or no to that trip to Nova Scotia or no to that night out, or no to that project or no to that person who wants to be naked with you but you worry about what your friends will say.
No is for wimps. No is for pussies. No is to live small and embittered, cherishing the opportunities you missed because they might have sent the wrong message.
…
What matters is that you do good work. What matters is that you produce things that are true and will stand. What matters is that the Flaming Lips’s new album is ravishing and I’ve listened to it a thousand times already, sometimes for days on end, and it enriches me and makes me want to save people. What matters is that it will stand forever, long after any narrow-hearted curmudgeons have forgotten their appearance on goddamn 90210. What matters is not the perception, nor the fashion, not who’s up and who’s down, but what someone has done and if they meant it. What matters is that you want to see and make and do, on as grand a scale as you want, regardless of what the tiny voices of tiny people say. Do not be critics, you people, I beg you. I was a critic and I wish I could take it all back because it came from a smelly and ignorant place in me, and spoke with a voice that was all rage and envy. Do not dismiss a book until you have written one, and do not dismiss a movie until you have made one, and do not dismiss a person until you have met them. It is a fuckload of work to be open-minded and generous and understanding and forgiving and accepting, but Christ, that is what matters. What matters is saying yes.

Reblog:
…an interesting point, but mostly valid when applied to photos - text (and vector art) is a different story. The original post’s claim that magazines print at about 300dpi appears to be referring to the general rule that photos should be prepared at 300pdi. However, those photos are then run through a halftone screen at approx. 133-175lpi. There are a number of other factors that make it hard to directly compare the printed page with device screens, but the message of the above post is quite correct.
Text in print remains significantly higher quality than on digital devices. While photos start at 300dpi and are cut down into halftone screens for print, text begins it’s life as a series of vectors and is output at the native device resolution for the printer which can run in the thousands of dpi for offset printing. I’m painting with broad strokes here (both for brevity and because I am pulling rough numbers from memory) but as amazing as some of the new displays are, they’ve still got some catching up to do.
While I disagree with the claim that digital screens are surpassing the printed page (strictly in terms of resolution), I would agree that the print and digital design workflows are converging. I think we will see that this convergence is going to be driven by new and improved tools for creating content as much as by improvements in the devices used to consume content.
New Business Cards...
I’m very happy with my new business cards - designed by the good and talented people at Alloy Workshop in Charlottesville, Virginia. While there’s a lot of room to speculate on the current and future relevance of the business card in a market that is more and more relying upon digital communication, I still feel that it makes a great anchor point for a larger identity overhaul. If you are reading this at the time it is originally posted, you are getting an early look at the next step - a new design for my entire website that I will be rolling out in the near future.
How I work now – the iMac stand
My previous blog post revisited my old computer setup for location photography – the MiniKit. Now, I’d like to show how I’ve been working since the MiniKit was retired. Pictured below is a fairly new 24″ iMac mounted on an Avenger A122 mini low combo stand using a platform I designed and made myself.
In use this setup is surprisingly stable, takes up very little space, and is easy to move around a location. It addresses quite well most of the minikit’s shortcomings. The iMac has the processing and graphics power to handle large files while the stand provides a convenient standing work height and – unlike the clunky metro shelving cart I used to use – it collapses very quickly and is easy to transport.
Now, some details. The first three photos show the top of the work surface and how the iMac is held in place.
Next, here is a look below the platform showing the two struts I made to stabilize the top. The platform is secure without the struts, but they help give it a solid feel.
This photo shows the bag I hang from the back of the platform. Basically the bag contains the end of a three outlet extension cord, the power cord for the iMac, and the power supply for an Epson PictureMate printer. When setting up, I just pull the ends I need out of the front of the bag.
The last picture shows the printer strapped to the side of the platform. The PictureMate’s handle makes it a perfect fit for this application. I use this printer to provide small prints for the clients’ reference. Using Lightroom, I can add customized job-specific information and print on the fly without much extra effort.
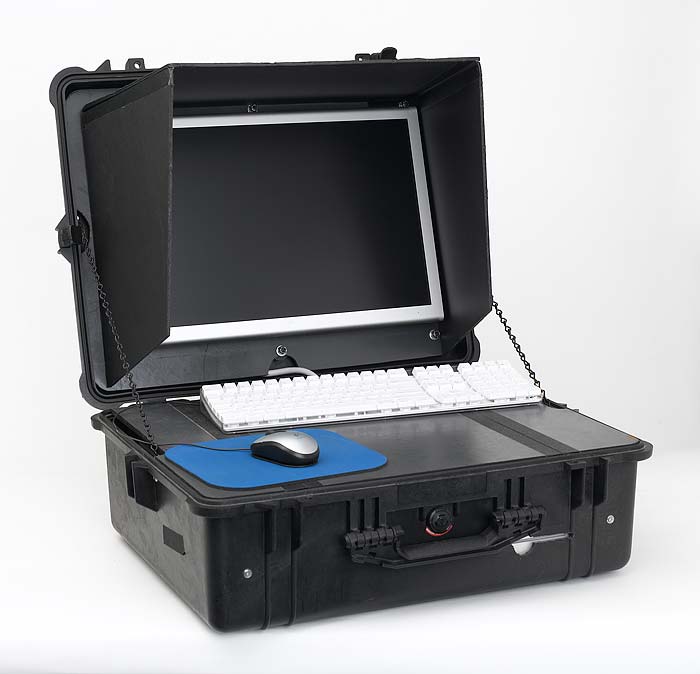
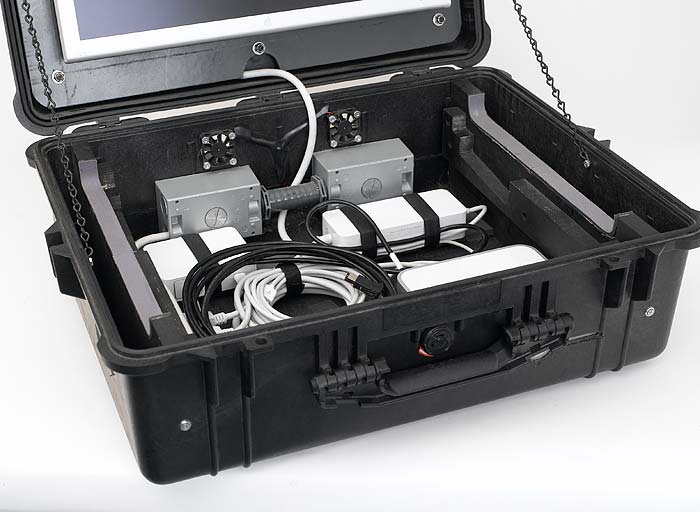
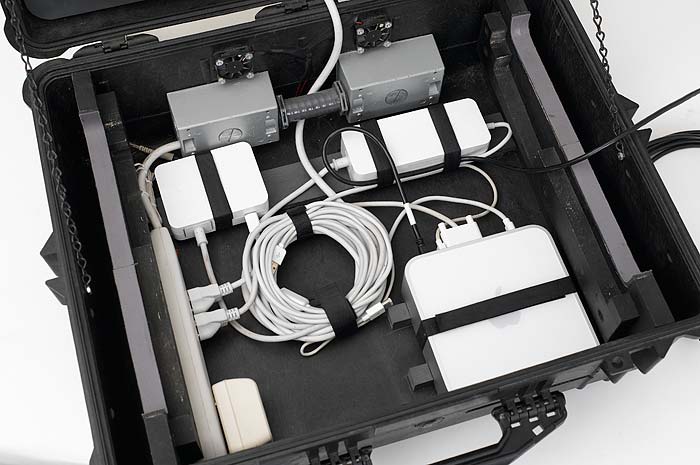
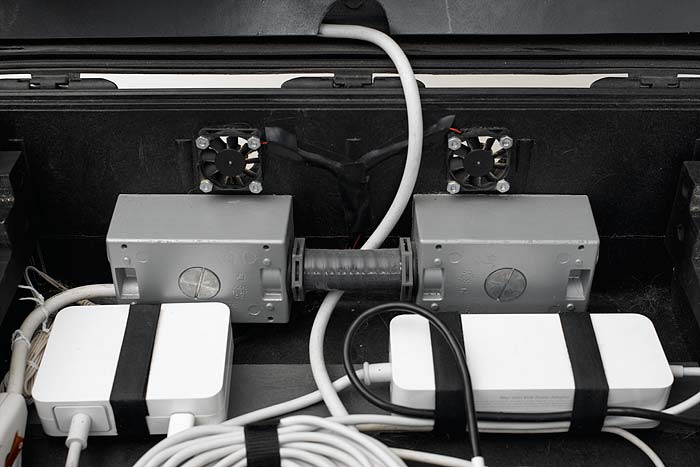
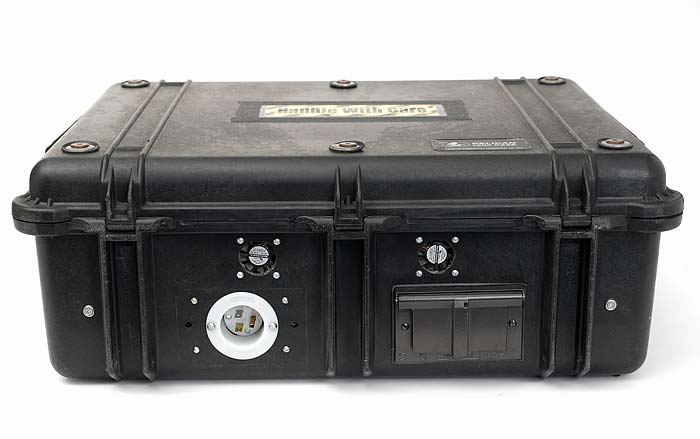
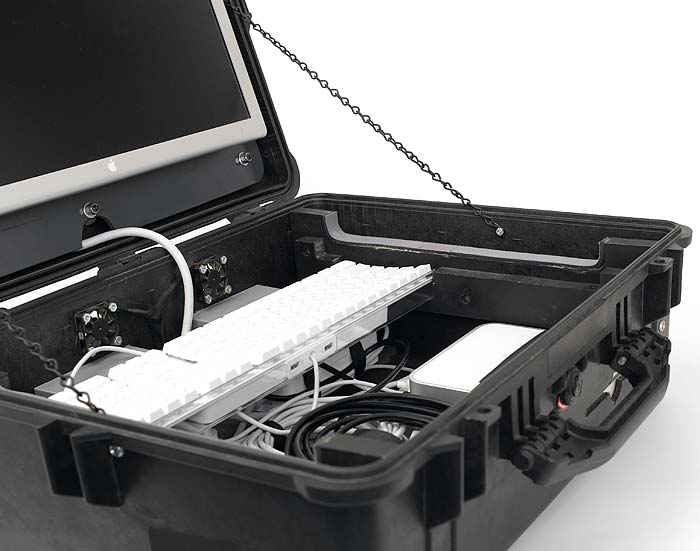
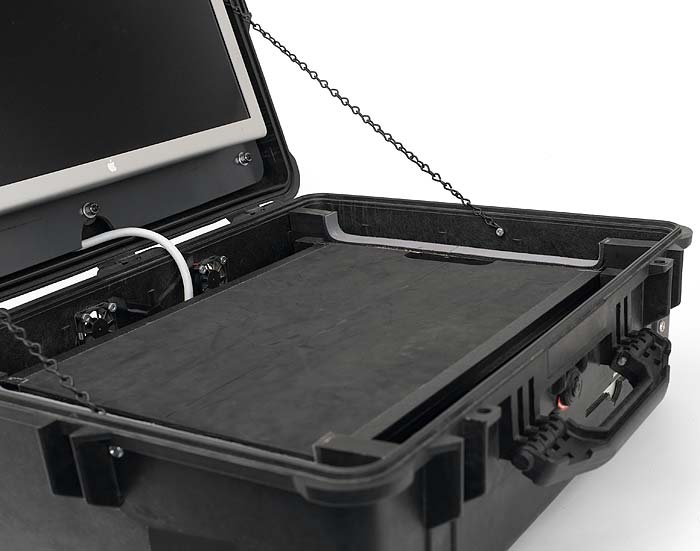
A Look Back at the Minikit
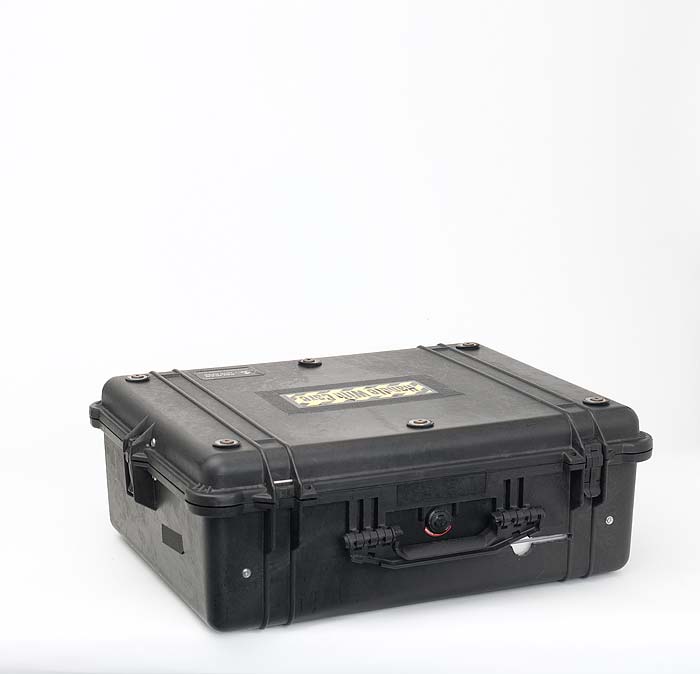
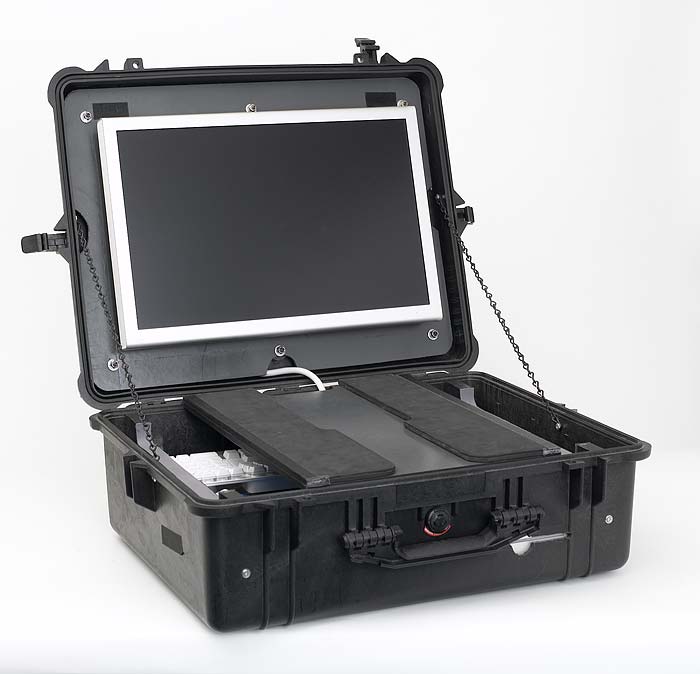
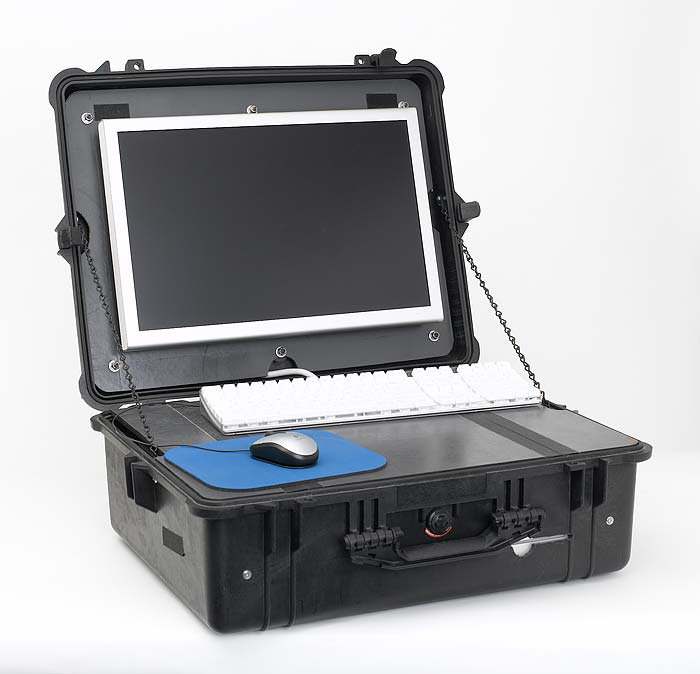
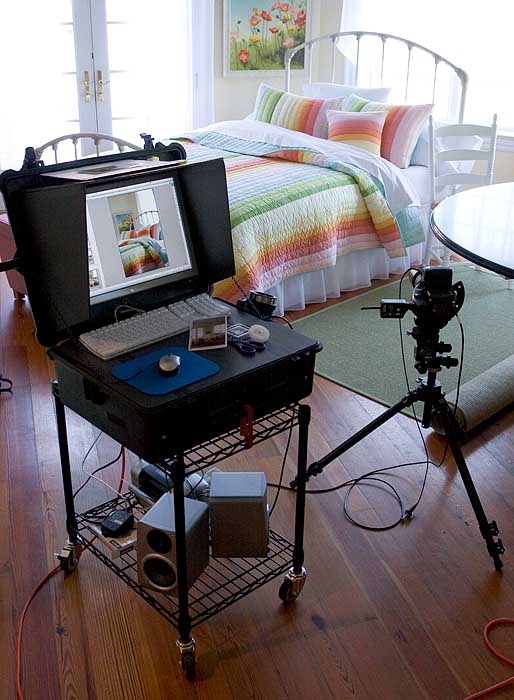
A few years ago an already old gallery of my computer kit – a Mac Mini and 20-inch Apple Cinema Display mounted in a Pelican case – caught the interest of several Mac and photo blogs. I quickly saw several hundred thousand hits in a few days and still see regular traffic each month. The minikit was retired a few months later, but I have a lot of fond nostalgia for that system and often look back at it to see if I can capture some of that old magic for my next system revision. Because of the apparent continued interest in the minikit, and to provide some insight on how I approach my gear, I’m reposting the images from that gallery here on my blog. Later I’ll post details about my current system; a much different approach than what you see here, but still somewhat unique.
Keep in mind that this kit was originally put together back in 2004-2005. It started as a way to conveniently and safely carry a cinema display that was driven by a 12″ Powerbook. I worked that way for several months until Apple announced the Mini at Macworld in January 2005. I knew it would be a perfect fit and ordered mine minutes after the keynote ended. Despite its limitations the system served me well for a couple of years. Although the need for more power eventually led me to move on, I still miss seeing the ways people would react when they first saw the minikit in action.


Personal project - the Olio Portrait Series
I have recently completed a series of portraits to help commemorate the one year anniversary of Olio - a creative open forum holding regular events in Charlottesville, VA.
Click any of the thumbnails below to view larger.


As Star Wars fans go, I’m the quiet type. I’ve never camped in line or blogged my lamentations about episodes one, two, or three. But I do like this series of travel posters by Justing Ven Genderen representing several locations from the original trilogy. The illustrations lend a vintage look to futuristic themes (that did happen long, long ago after all). Follow the link above to see more.
And yes, I will be teaching my son that Han shot first.
Old Brass Lens Project - First Test on Mamiya
It’s not very pretty, but I have mounted the old brass lens on my Mamiya 645AFD (to view my introductory post on this project, click here). With a little luck I found a rubber pipe fitting that is just the right size to grab the back of the lens. I then cut a large hole in a body front cap and used a liberal amount of epoxy putty to fasten a piece of PVC pipe to the cap. The pipe fitting and lens can slide on the PVC pipe to allow a decent focus range. As you can see below, it’s not very pretty but it does get the job done…
Early tests are interesting. First, it is difficult to handle. I haven’t figured out its aperture yet, but the view through the camera’s eyepiece is quite dark and lacks contrast. The image never really appears to be in focus. I find it’s best to slide the lens to get as close a possible and then move slightly forward or back until I think I’ve got it. Technically I should be working on a tripod, but honestly I’m not using this lens to get technically perfect images — which brings me to the following point.
The way to get nice images from this lens is to push its flaws. Specifically, it will flare when presented with bright specular highlights - or better still, just let the sun shine straight in. The RAW file will be horribly washed out, but in the digital age, a flat image is an image with a lot of detail. Plenty there to work with to render the scene nicely.
I took the camera out in our mid-atlantic winter wonderland yesterday evening and early this morning and was able to capture some nice samples. Click any of the images below to open a larger version in a new window.


Perky Bros LLC - found via John Nack
I’m a big fan of letterpress printing and am always happy to find great designs that show off the process. I hope to use letterpress for some of my own materials in the near future. Keep an eye here in the coming months as some design projects are already underway.

This is not new, but I only recently came across it on the web. It looks like the film is moving to wider, though still very limited, release soon. I’ll be keeping an eye out for this one.

Emma Catherine Franck - Born on November 25, 2009
Progress has been made on the brass lens project, but everything was put on hold last week with the arrival of little Emma. So far she’s the most perfect little baby we could have hoped for.
Old Brass Lens Project - Introductory thoughts
I’ve had this old brass lens sitting around for years and I’m curious to see what kind of image it will make. Just how to put it to good use is a bit of a puzzle. The lens is very simple. Just two elements bookend a fairly rudimentary but clever aperture system. There are three tabs (of which you can see two in the photo above) sticking out of the lens barrel. These tabs each pivot a different sized stop into the central opening. The tabs are numbered (3, 5, 7), but obviously don’t correlate to familiar f-stop values (the numbers get larger as the size increases).
Otherwise, that’s it. No shutter or focusing mechanism.
The most natural fit for this lens is on a 4x5 camera. Mounting would be as easy as crafting a simple lens board - there’s no way this lens will require precision alignment. However, the lack of shutter means I would have to use some kind of lens-cap-as-shutter trick. Quite feasible if my exposures can be kept in the several second range.
My other option would be to rig a mount for my Mamiya. This would be a challenge as I’d have to create a way to move the lens for focusing (and while I’m at it maybe swings and tilts). The benefit to all this work would be that once set up, shooting would be easy using the camera body’s metering system and focal plane shutter. Plus, digital capture would allow immediate results and lots of freedom to play.
There are pros and cons to both paths but in my mind the correct answer is clear.
Do both.
My first step will be to get the lens on a workbench. There I’ll figure out the approximate focal length an get a sense of how large an image it projects. I can also translate the aperture measurements to f-stop values and get a sense of what my exposure times might be on the 4x5. I’ll document this process and post more in the next few days.